
Purpose of the article: It is designed to automate the processing of recurring payments by securely scheduling, managing, and processing transactions from various sources. This ensures seamless integration, accurate reporting, and a unified platform for tracking scheduled payments.
Intended Audience: E-commerce Developers, Payment System Integrators, Business Analysts
Tools and Technology: Stripe API, Payment Scheduling Platforms
Keywords: Payment Integration, Recurring Payments, Stripe API
What is Stripe?
Stripe is one of the global systems that facilitate individuals and companies to pay and receive payments over the internet. This service is responsible for handling existing credit card transactions, including secure data handling, automatic payment scheduling and withdrawals.
Why use Stripe?
Stripe offers a wide range of features, such as subscription management, fraud prevention, customizable checkout, and smooth integration options, making it a favored solution for online businesses looking for dependable and scalable payment processing.
Integrating Stripe with Spring Boot:
To connect Stripe with a Spring Boot application, you can follow these steps:
- Pre-requisites:
• Java 17+
• Database: PostgreSQL or any as per requirement
• Dependencies or packages to be installed
• Stripe secret keys
# Maven:
					  xml
<dependency>
  <groupId>com.stripe</groupId>
  <artifactId>stripe-java</artifactId>
  <version>25.13.0</version>
</dependency>
#Gradle:
compile "com.stripe:stripe-java:25.13.0"
Check the latest version for dependencies here.
Detailed Integration:
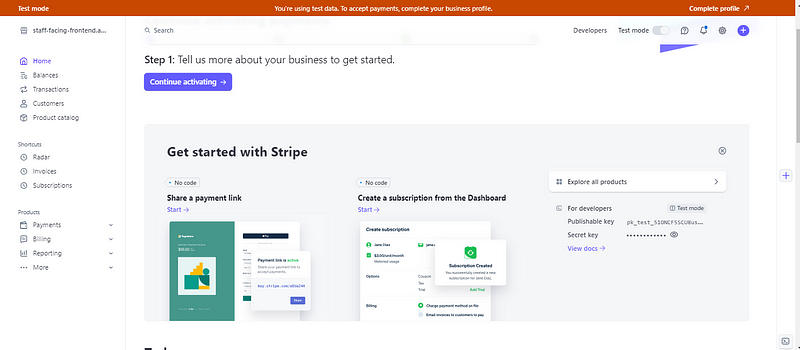
- Create a Stripe Test Account to obtain secret keys:
The first step you need to take is go to the Stripe website and create an account to get your secret and publishable keys. Place these keys in your application property files within `application.properties` or `application.yml` when integrating the Stripe APIs. The publishable key is needed on the front end to call back-end APIs.
- Create a customer profile in Stripe:
Make use of the stripe API for creating a customer profile:
CustomerCreateParams params = CustomerCreateParams.builder(.setEmail(email)
.setName(name).build(); Customer customer = Customer.create(params);
Integrating Payment Methods:
According to the documentation, there are 2 methods for collecting payment details from customers – Setup Intent and Payment Intent. Each has its use case.
#Setup Intent:
- Purpose: Used to save a payment method for a future payment without charging the customer right away.
- Use Case: This technique would work, for example, if a customer wants to save a payment method for when he starts a subscription later or for later when he prefers to make a one-click purchase.
- Steps: The paid detail is willingly given to the customer and is well saved for future use without charging the customer.
Example of setup intent using Spring Boot:
					@Value("${stripe.secretKey}")
private String stripeKey;
Stripe.apiKey = stripeKey;
SetupIntentCreateParams.Builder setupIntentParamsBuilder =
                SetupIntentCreateParams.builder()
                 .setCustomer(stripeCustomerId)
                 .setUsage(SetupIntentCreateParams.Usage.OFF_SESSION)
                 .setAutomaticPaymentMethods(SetupIntentCreateParams.AutomaticPaymentMethods.builder()
.setAllowRedirects(SetupIntentCreateParams.AutomaticPaymentMethods. AllowRedirects.NEVER).setEnabled(true). build());
SetupIntent createSetupIntent = SetupIntent.create(setupIntentParamsBuilder.build());
log.info ("Created SetupIntent: {}", createSetupIntent);
SetupIntentResponse setupIntentResponse = new SetupIntentResponse();
setupIntentResponse.setSetupIntentId(createSetupIntent.getId());
setupIntentResponse.setSetupIntentClientSecret(createSetupIntent.getClientSecret());
setupIntentResponse.setStripeCustomerId(stripeCustomerId);
return setupIntentResponse.
For more information about the Stripe Setup Intent API, visit here.
Note: Use Payment Intent if you want to charge the customer immediately. Visit here for more information.
Example Payment Flow:
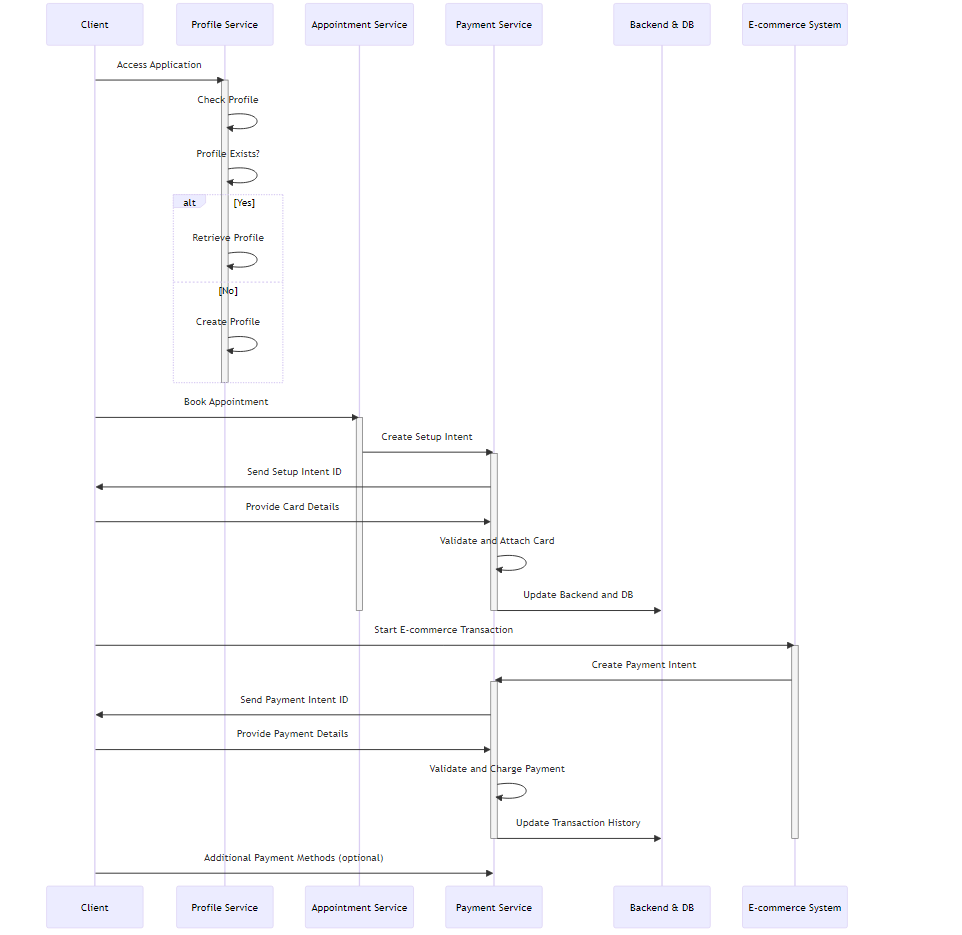
- Client Profile Check:
– Client accesses Single Page Application (SPA).
– Check whether the client has a profile in Stripe:
☑ If there is a profile available, get back the existing customer profile.
☒ In the absence of a single profile, new profile must be generated through Stripe’s Create Customer API.
- Client Profile Check:
– When interacting with Stripe API create a setup intent for the future payment setup.
– Capture card information in a secure manner using the Setup Intent ID and client secret obtained from Stripe.
– Use Stripe’s API to authenticate and incorporate the card information into the customer profile.
– Card linked status and customer profile data are archived in the database.
- Client Profile Check:
– When the client places a buy order, create a Payment Intent using Stripe API.
– Capture payment information in a secure manner using the Payment Intent ID and client secret information obtained from Stripe.
– Charge the payment using Stripe’s API after authentication.
– Post details of the transaction in the database and keep track of the purchase details.

Author Bio:

Gulsha Shreekumar CHAWLA
Software Engineer - Digital Transformation
Backend Developer with 2.5 years of experience in Spring Boot, REST APIs, databases, and design patterns, building scalable and efficient systems.