Purpose of the Article: In this blog, we have explained how we can implement Snowpipe on GCP Cloud.
Intended Audience: Developers working on Snowflake and GCP Cloud
Tools and Technology: Snowflake and GCP services
Keywords: implement Snowpipe on GCP cloud.
DATA LOADING TO SNOWFLAKE FORM GCP THROUGH SNOWPIPE
OBJECTIVE:
How to establish a Snowflake Snowpipe on GCP.
INTRODUCTION TO SNOWFLAKE:
It is a process of continuous data loading, whenever the data is available in the stage. It can handle large data sets.
ARCHITECTURE OF SNOWPIPE FLOW TO INGESTION OF DATA FROM GCP:

PROCESS OF SNOWPIPE CREATION TO LOAD DATA INTO SNOWFLAKE:
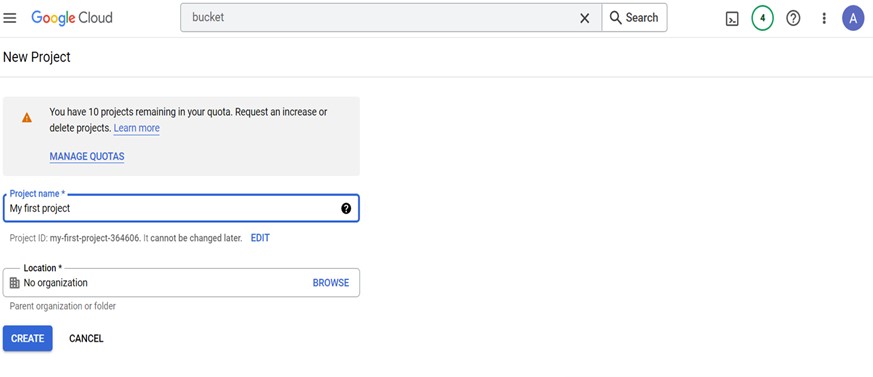
Step 1: To create a Project in GCP:
- Login to GCP account
- Click on navigation menu then select IAM & ADMIN>>CREATE A PROJECT
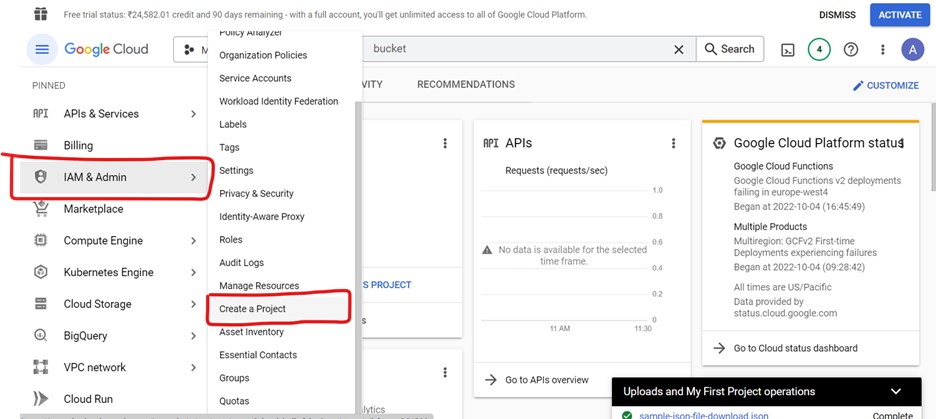
- Click on create a project tab then it redirects to project creation page, enter the project name and then click on create button to create a project
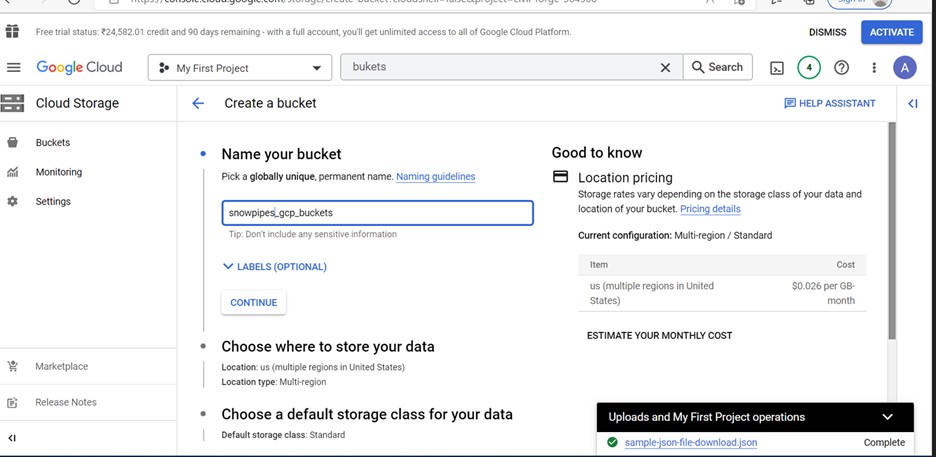
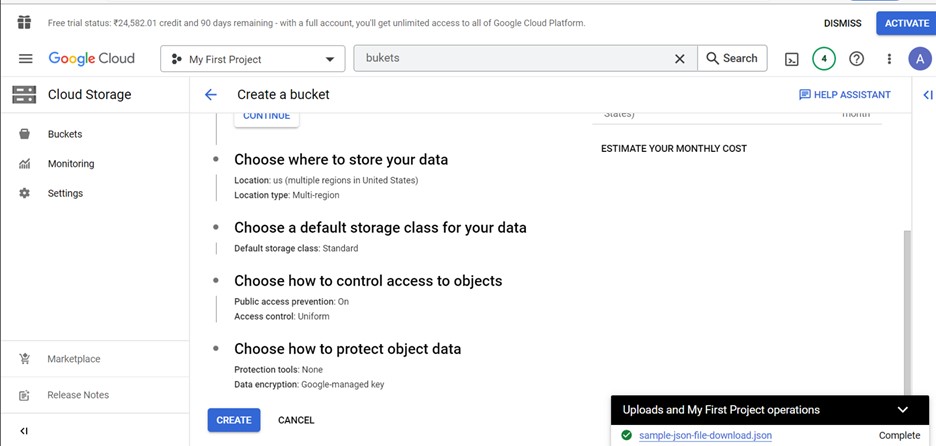
Step 2: Steps to create bucket in GCP:
- Search for bucket in search bar, click on buckets

- Click on create button
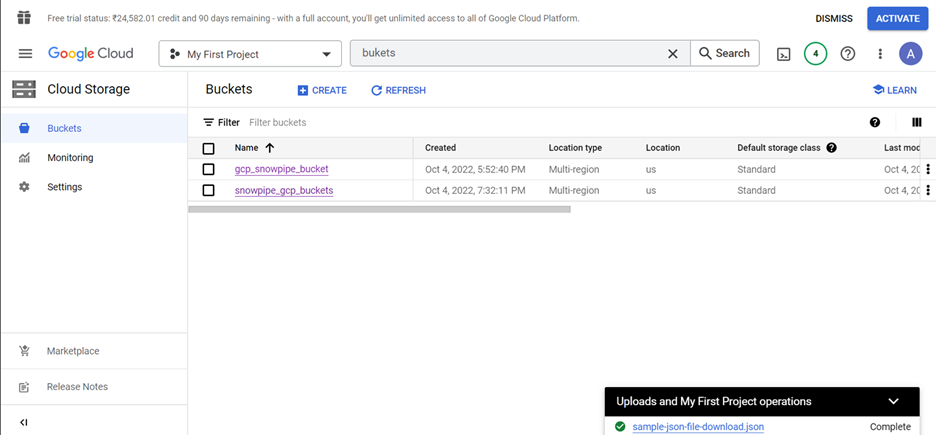
- Enter a proper name to the bucket and click on create button
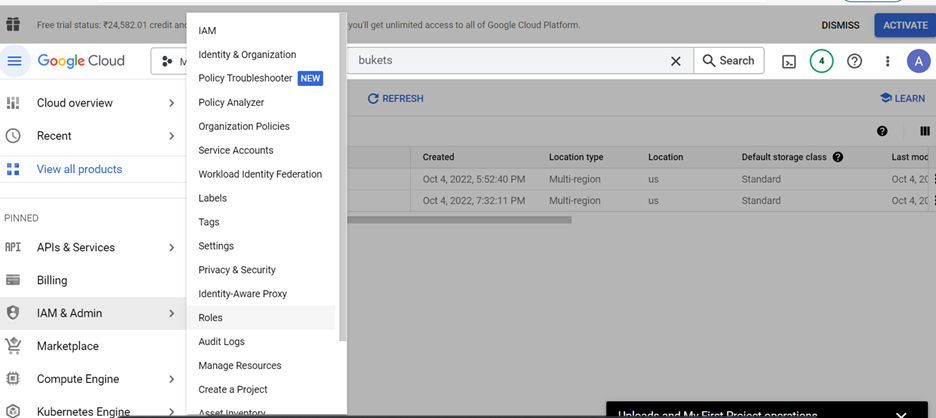
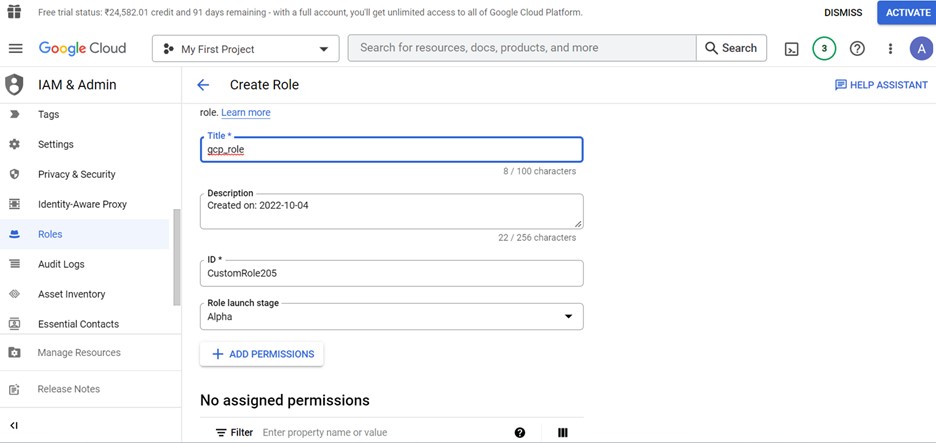
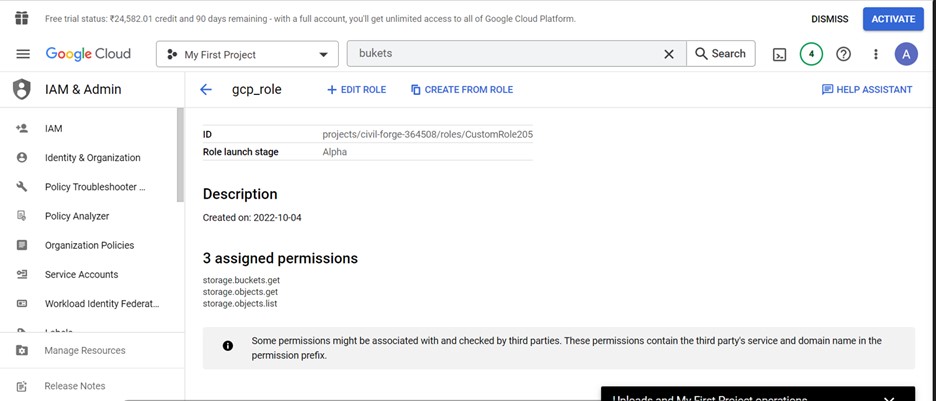
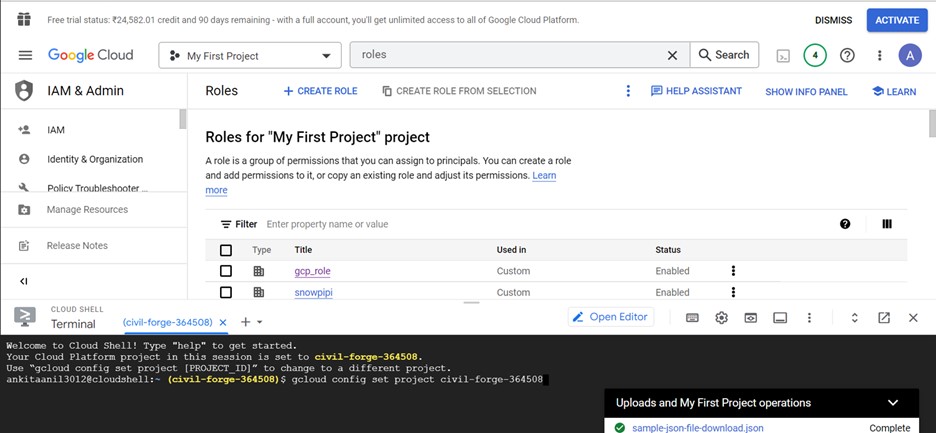
Step 3: Steps to create a IAM role in GCP:
- Select IAM & ADMIN>>ROLES
- Click on create roles
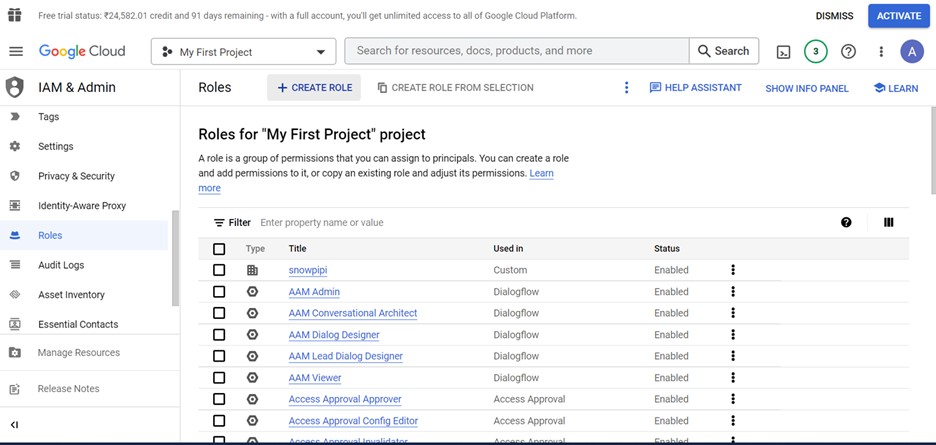
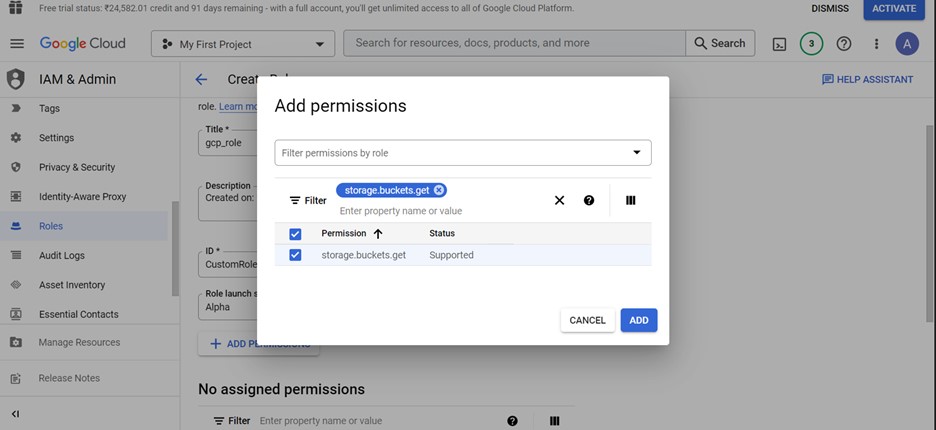
- Enter a name unique name to the role and click on add permission to add the permissions to the role. Below are the different permissions
Data loading only:
- Storage.buckets.get
- Storage.objects.get
- Storage.objects.list
Data loading with purge option:
- Storage.buckets.get
- Storage.objects.delete
- Storage.objects.get
- Storage.objects.list
Data loading and unloading:
- Storage.buckets.get
- Storage.objects.create
- Storage.objects.delete
- Storage.objects.get
- Storage.objects.list
Data unloading only:
- Storage.buckets.get
- Storage.objects.create
- Storage.objects.delete
- Storage.objects.list
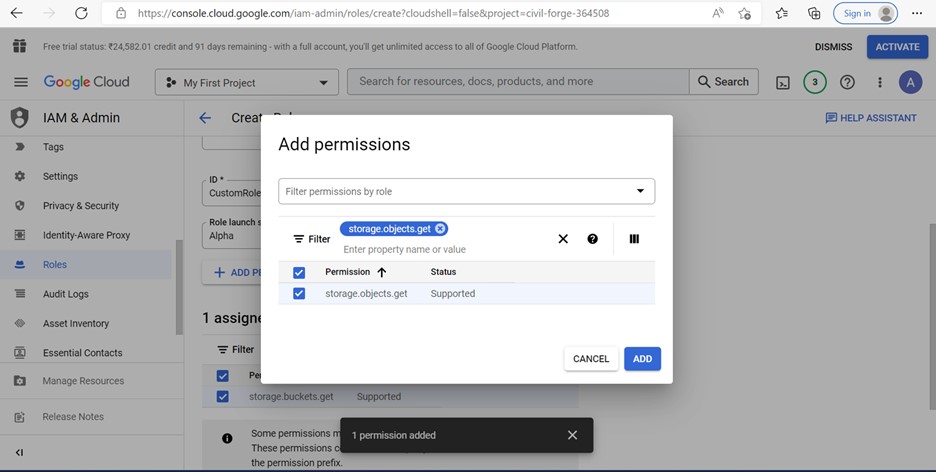
- Now we are adding permissions for data loading only
- After clicking on add permission button, search for permissions required then tick the check box and finally click the add button to add a permission
- Following above step add other two permissions also
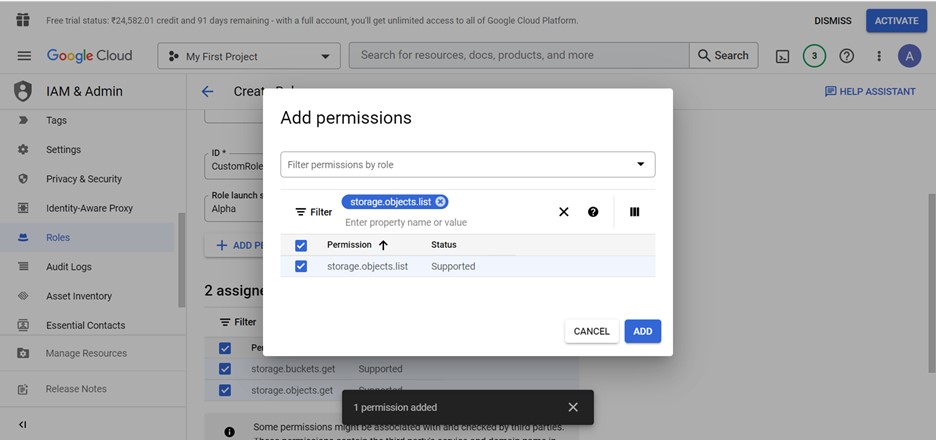
- Below are the descriptions and permissions assigned for the role
Step 4: Create a database:
- Login to the snowflake account
- Open new workbook
- Create a database

Step 5: Create a table:
- Create a table to copy the data from stage

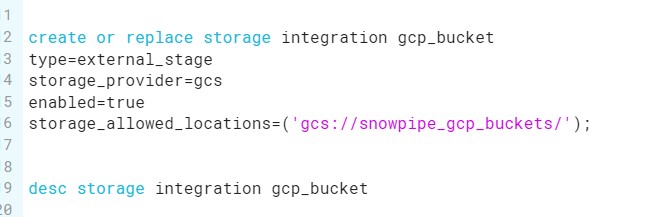
Step 6: Create a storage integration
- Create a storage integration using GCP bucket
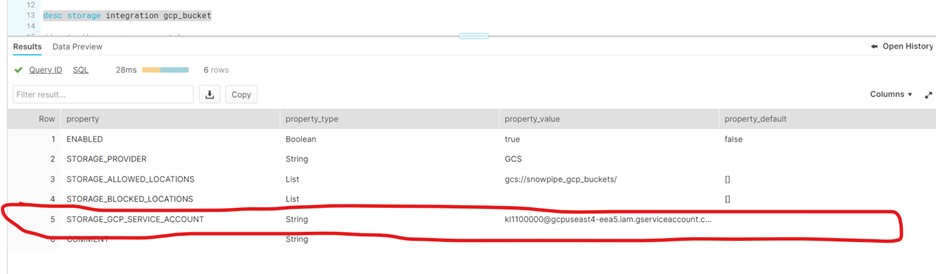
- Run desc of the storage to get the storage description and details
- Below is the output we got when we run the desc command
- Copy the storage_gcp_service_account property value
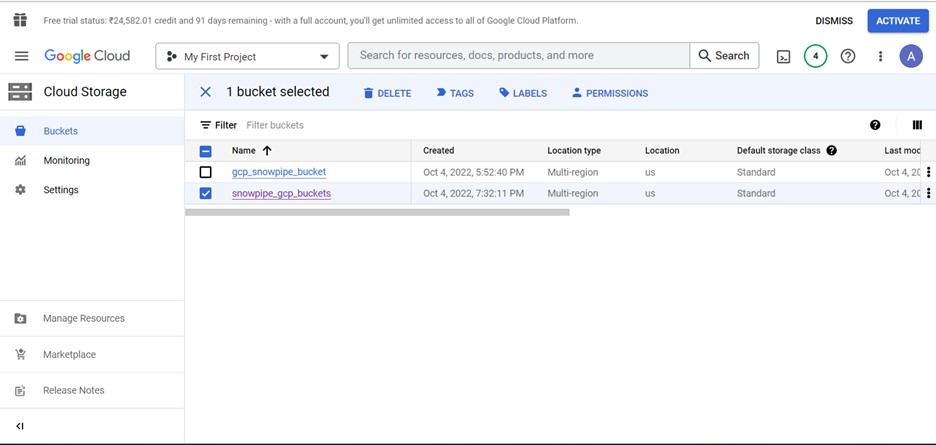
- Redirect to GCP account and check the check box of bucket created and we can see permission tab is enabled at top
- Click on permissions tab to add permissions
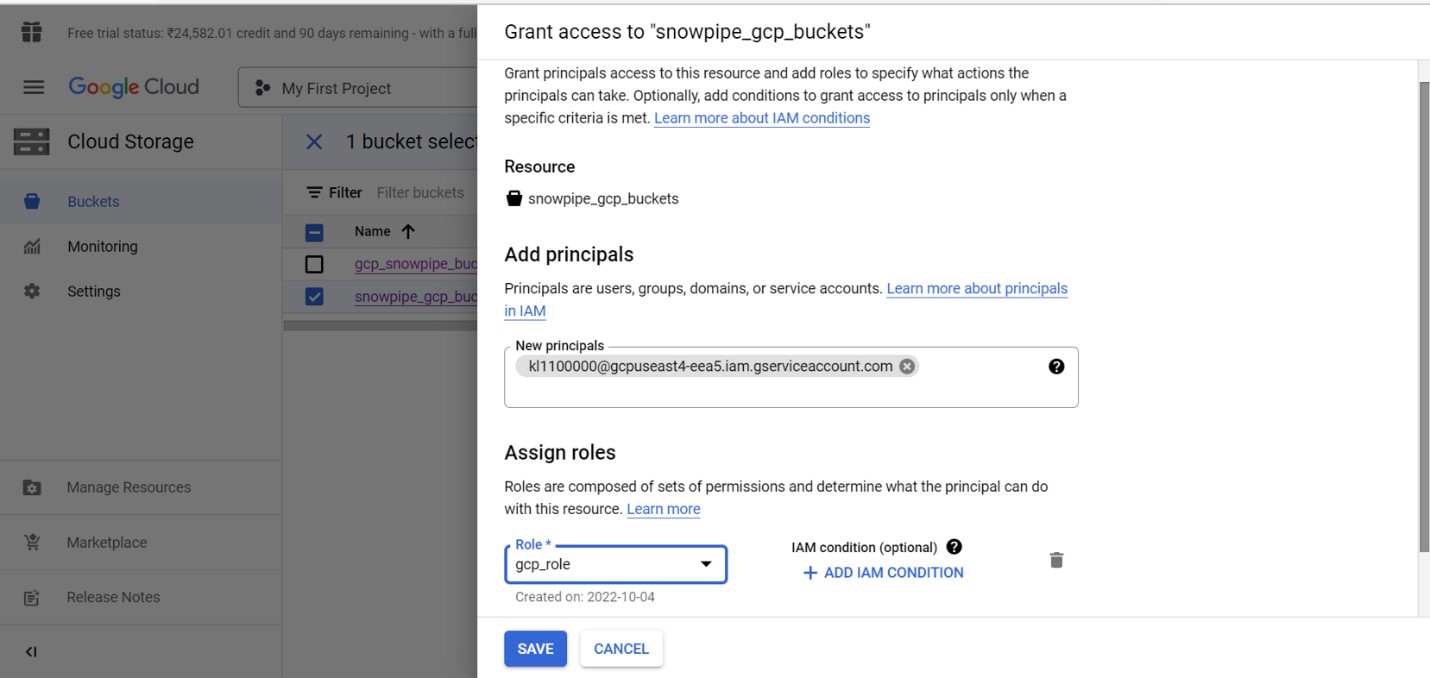
- Click on ADD PRINCIPAL button to add principle

- Enter the storage_gcp_service_account name which we copied earlier
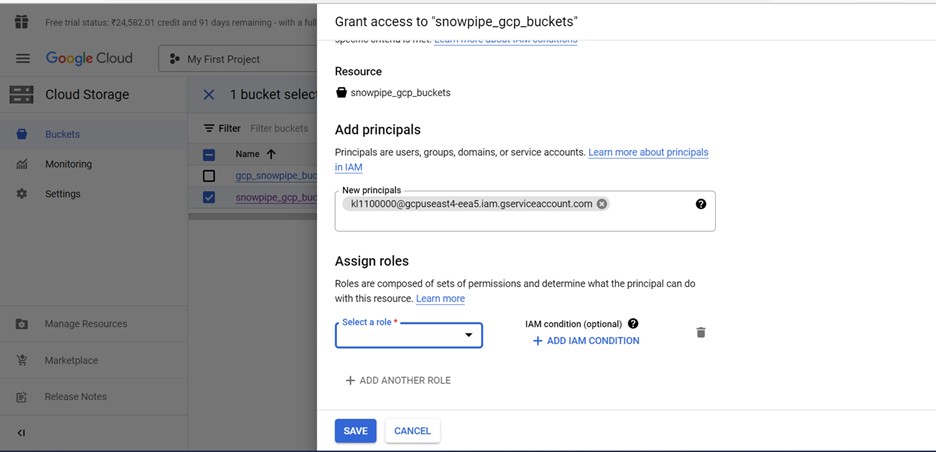
- Select the roles custom>>gcp_role
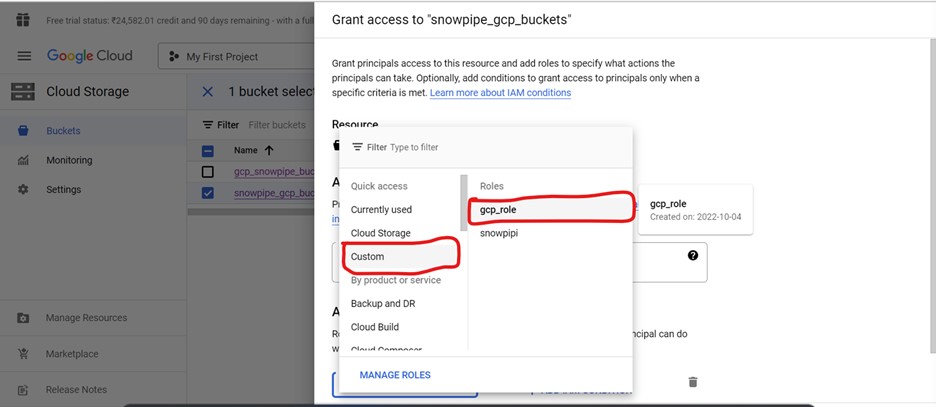
- Click on save button
Step 7: Create a stage:
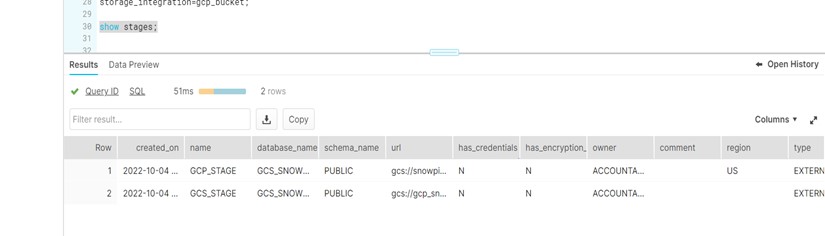
- Create a stage using GCP bucket and storage integration details
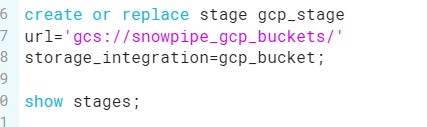
- Run the show stages command to get the details of all stages which were created
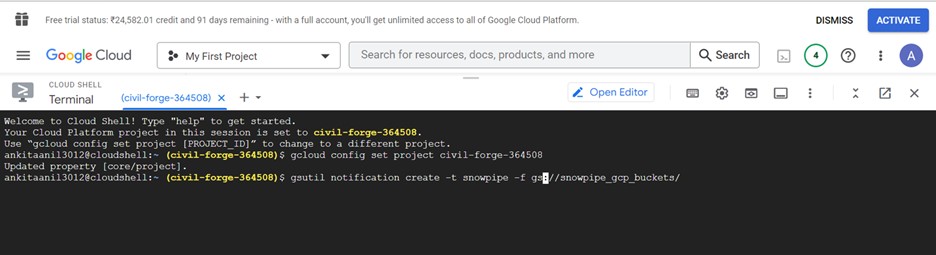
Step 8: Create an event subscription:
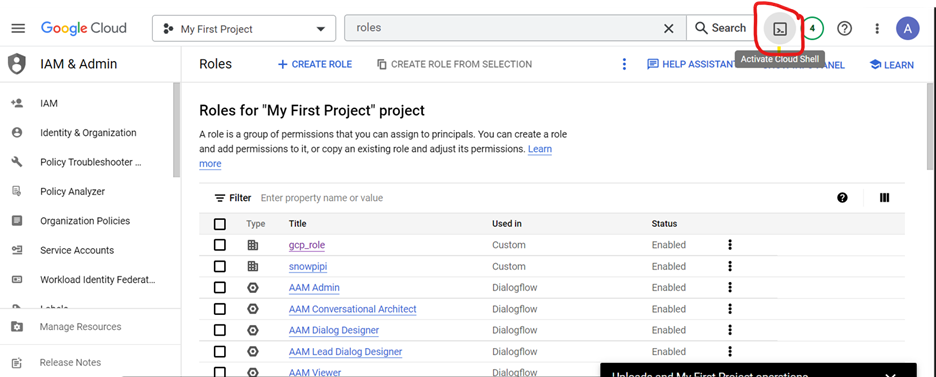
- Redirect to the roles page, click on the Activate cloud shell
- It will redirect to the cloud shell terminal. Which looks like below
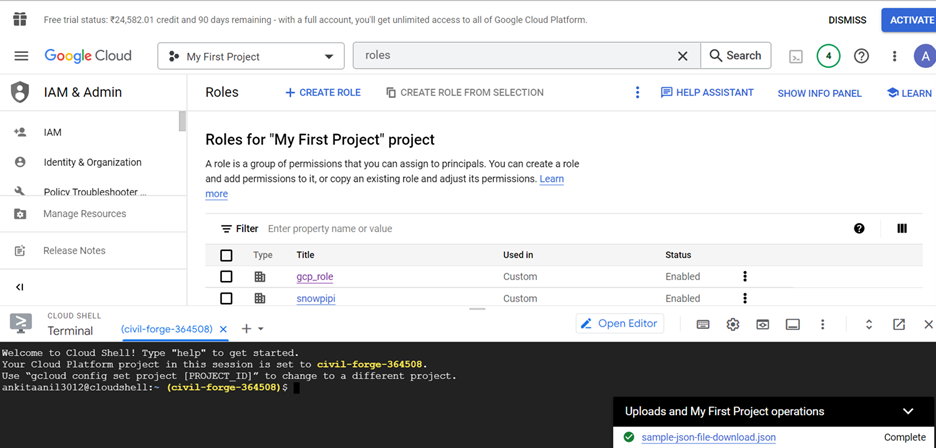
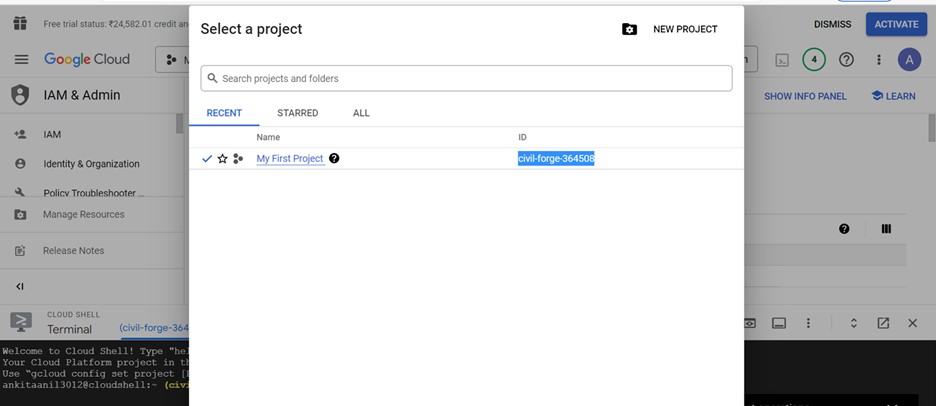
Click the My First Project dropdown, copy the ID of the Project
- Enter gcloud config set project and click enter
- Creating the pub/subtopic
- Then enter the gsutil notification create -t -f json gs:/bucket_name/, topic is the name of the topic and bucket_name is the name of GCS bucket and click enter
- Below is the output

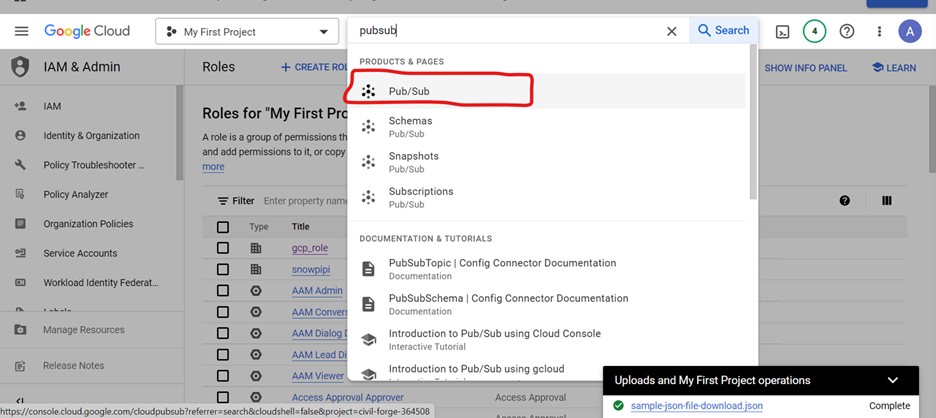
- Search for pub/sub in search bar and select the pub/sub option
- Redirect to below page, click on the topic created earlier i.e
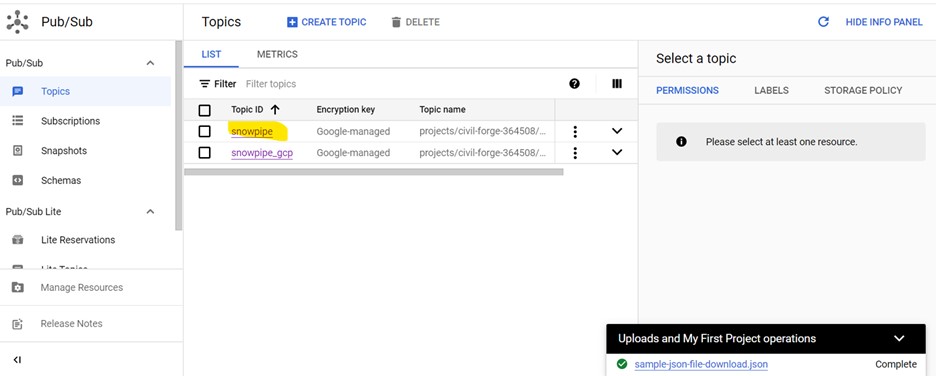
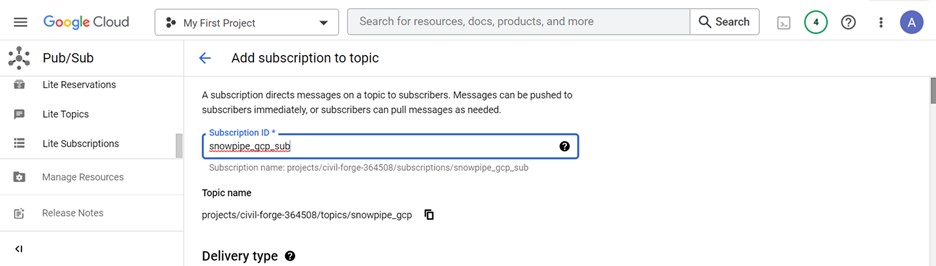
- Click on create subscription button to create a subscription
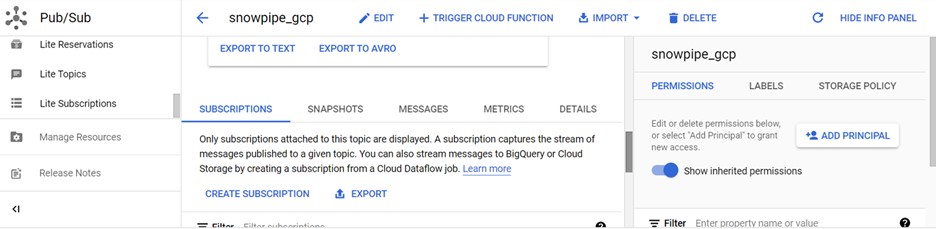
- Enter the name of subscription and click create button to create a subscription
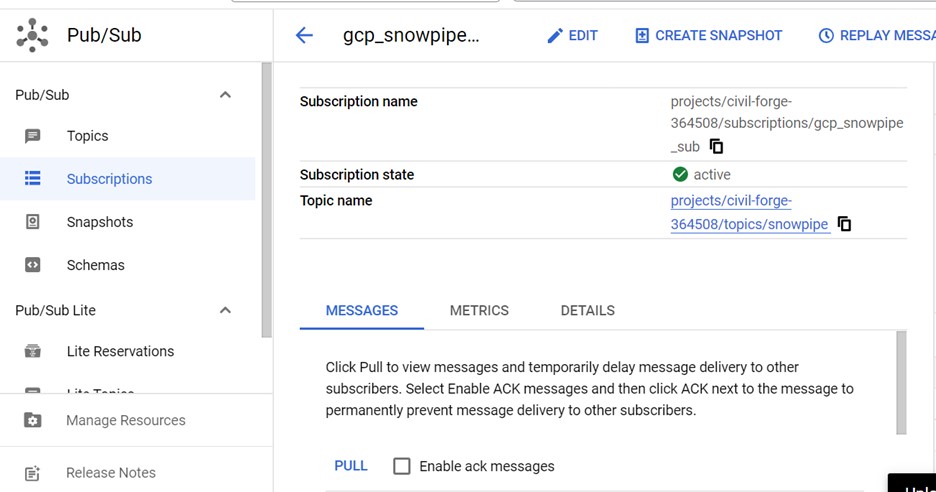
- Click on subscription created and copy the subscription name
Step 8: Create a notification integration:
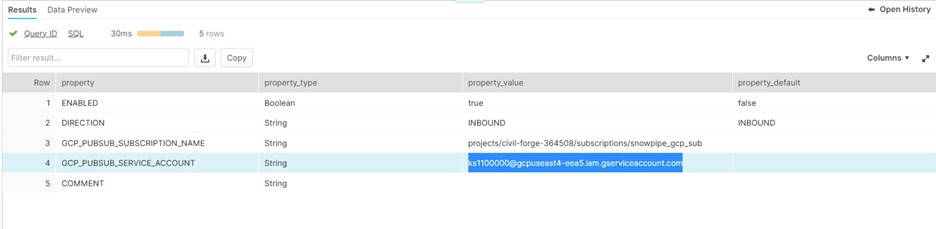
- Create a notification integration using subscription name


- Run the desc integration notification_gcp_snowpipe and copy the pubsub_service_account_name from the output.
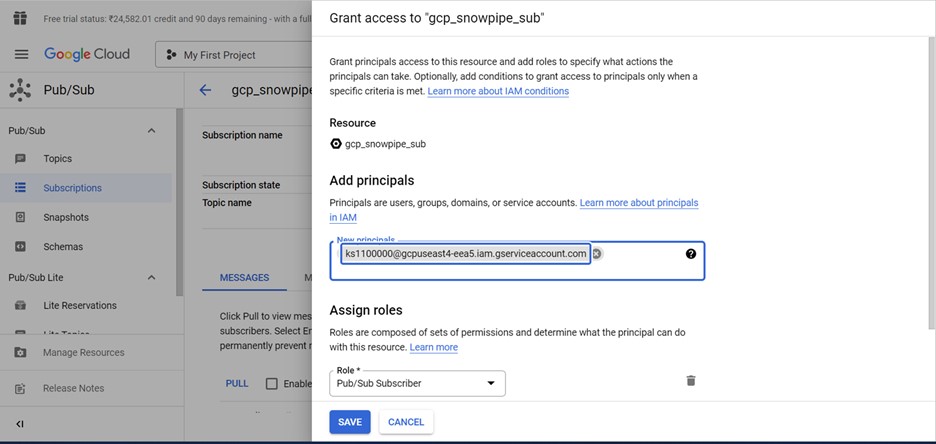
Step 9: Grant Snowflake Access to the Pub/Sub Subscription:
- Click on add principal button to provide access for subscription
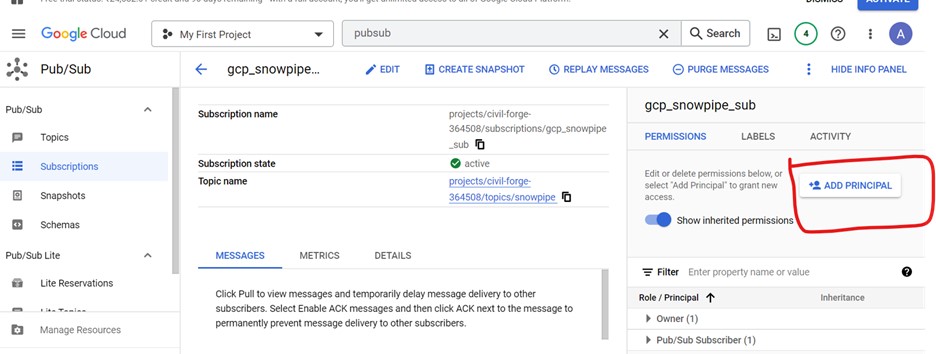
- Enter the pubsub_service_account_name in new principal field and select role as pub/sub subscriber
- Click on save
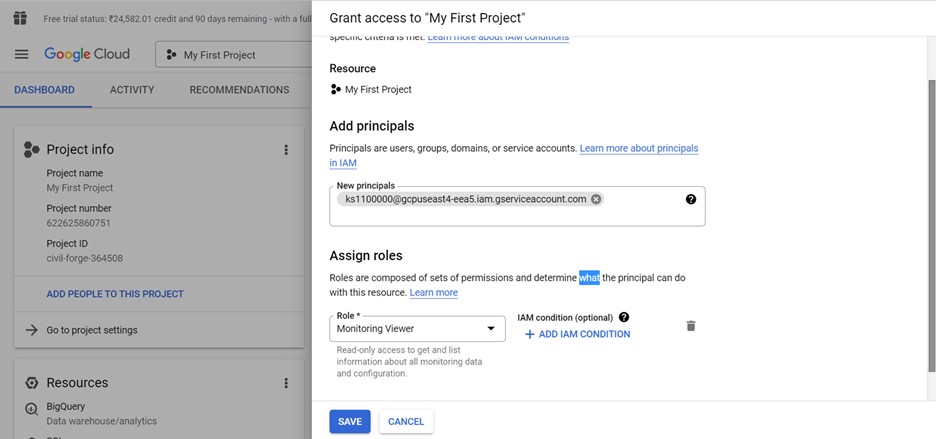
- Redirect to the dashboard and click on Add people to this project
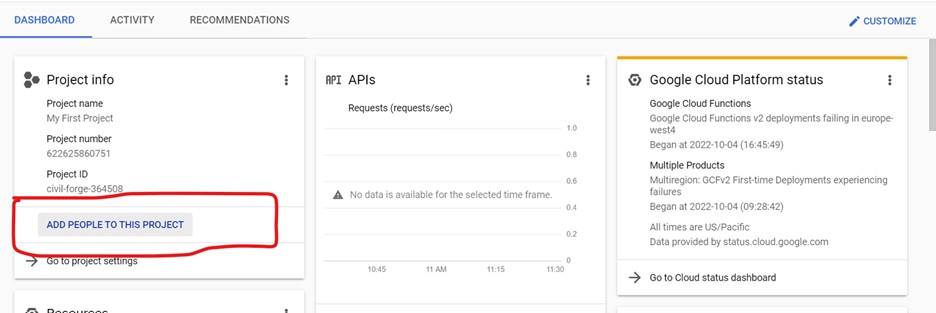
- Add the pubsub_service_account_name you recorded
- From the role dropdown, select Monitoring viewer
- Click on save
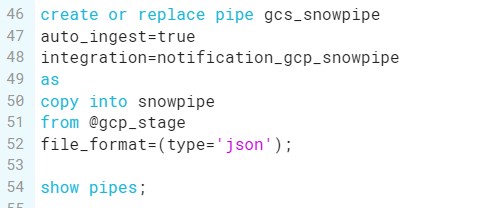
Step 10: Create a pipe to auto ingest:
- Create a pipe using notification integration, stage and file format based on the file type we are going to load
Create or replace pipe<pipe_name>
Auto_ingest=true
Integration=<notification_integration_name>
As
<copy_statement>
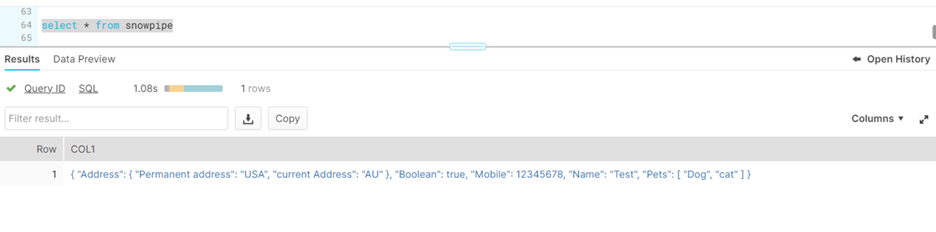
- Upload a JSON file into GCP bucket
- Run the pipe
- Run the select query for a table to see the data loaded into the table